Views: 0 Author: Site Editor Publish Time: 2026-08-10 Origin: Site
You press the button on the passenger door to let in some fresh air, but the glass refuses to move. Yet, when you reach over to the driver seat, the main console panel rolls it down effortlessly. This specific, frustrating scenario happens to countless drivers every single day.
Surprisingly, this exact symptom brings excellent news for your repair budget. It actively proves your window motor and window regulator function properly. This simple fact narrows your diagnosis strictly to the control circuitry connecting your interior doors. We will guide you through a logical, evidence-based diagnostic process today.
You will learn how to pinpoint the exact electrical failure point quickly. By following these proven steps, you can decide whether to replace components yourself or seek professional assistance. We remove the guesswork from automotive electrical troubleshooting.
If the window moves from any switch, the window motor and regulator are not the problem.
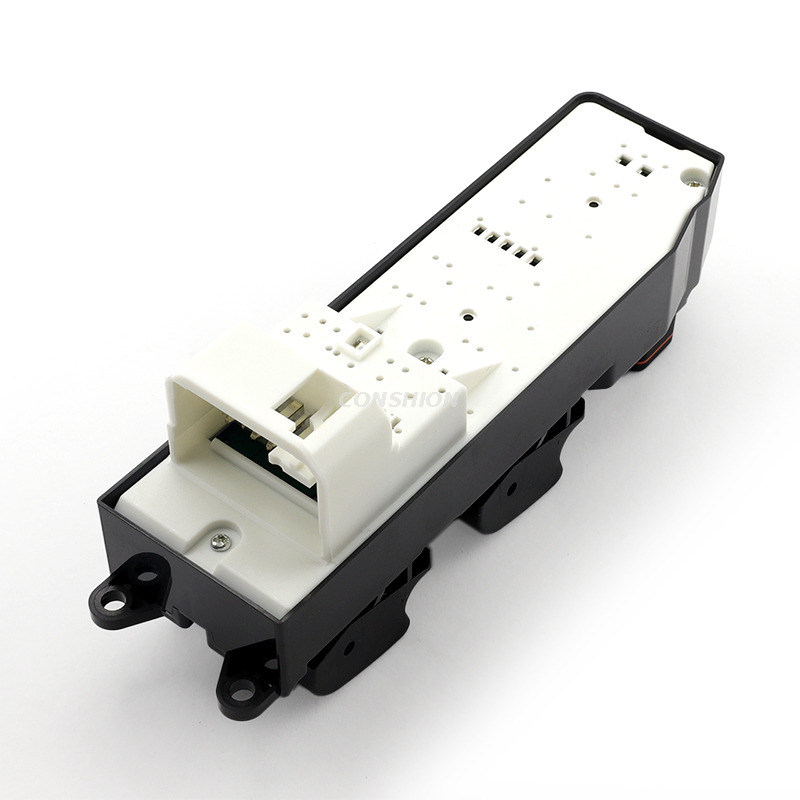
The most common culprit is a faulty contact inside a specific power window switch, though the child lock toggle is a frequently overlooked quick fix.
Proper diagnosis requires isolating the master switch assembly from the individual door switch before purchasing replacement parts.
Electrical testing (continuity checks) prevents the common mistake of "throwing parts" at wiring or body control module issues.
Prevent unnecessary spending by addressing the most common user error first. Many drivers eagerly buy replacement parts without checking their master window lock. This safety feature, commonly known as a child lock, sits directly on your main driver panel.
Automakers design this lockout button to interrupt either the power or ground circuit for safety. It physically stops electrical current from reaching passenger doors, protecting children from accidental pinch hazards. You or a pet might accidentally bump this toggle while driving or cleaning the interior. Before grabbing any tools, press the lockout button a few times firmly. Test the passenger door again.
If toggling the lock button multiple times restores intermittent function, you have uncovered a hidden issue. The master assembly likely harbors internal corrosion. Repeated clicking scrapes away minor carbon buildup on the internal contacts. This temporary fix confirms your master unit requires replacement.
You must rule out this lockout feature before tearing into door panels. A surprising number of professional diagnostic visits end right here. A technician simply presses the lockout button and charges a standard diagnostic fee for the easiest fix in the shop.
Best Practices for Initial Inspection:
Cycle the lockout button vigorously five to ten times.
Listen for a faint clicking sound inside the door panel.
Operate the passenger button simultaneously while holding the lockout toggle down.
You save both time and money by verifying this basic function. It provides an immediate baseline for further electrical testing.
We must frame our diagnostic evaluation based entirely on which button remains unresponsive. This logic prevents you from replacing perfectly good parts. Let us break down the two most common scenarios you will encounter during troubleshooting.
Scenario A: Fails at Passenger Door, Works at Driver Door
In this situation, the individual window switch on the passenger door likely failed. Its internal copper contacts often burn out over years of heavy use. Alternatively, the local wiring connector behind the passenger door trim may have vibrated loose over thousands of miles. The motor itself receives commands perfectly from the main driver controls. This rules out major mechanical faults entirely. You can focus your attention strictly on the passenger side panel.
Scenario B: Fails at Driver Door, Works at Passenger Door
This symptom points directly back to the main console. The master power window switch assembly contains multiple individual toggles. The specific internal contact dedicated to your passenger window has broken. The rest of the main console might function perfectly. Drivers use the master console constantly, making it highly susceptible to mechanical wear.
Understanding Diagnostic Logic and Routing
Passenger door electronics are routed directly through the main master console. Automakers wire these electrical circuits in series for safety override reasons. The master control dictates the final command. A failure inside the master unit can sever the electrical pathway for a passenger door.
Sometimes, you must replace the master unit even if the passenger button acts completely dead. Always isolate the symptoms by testing both door locations. Note exactly which button works and which button fails. This isolation technique remains the golden rule of automotive electrical repair. Professional technicians rely on this exact methodology to trace faults quickly.
Sometimes replacing the physical buttons does not solve your problem. You must understand the implementation realities of modern vehicle electronics. Two secondary failure points often mimic a broken button perfectly.
Door Jamb Wiring Risks
Wires travel from your main vehicle chassis into your door frame. They pass through a flexible rubber hinge boot. These copper wires bend and flex every single time you open the door. Over a decade of daily use, the internal copper strands become brittle. A frayed or broken wire inside this boot stops power delivery instantly. This high-risk area frequently causes intermittent electrical cutouts. You might notice the window working only when the door is halfway open.
The Central Computer Hub Factor
Modern vehicles rarely route high-amperage power directly through cabin buttons. Instead, these interior toggles send low-voltage data signals to a central computer. We call this central hub the body control module. The computer interprets your button press. It then sends high-voltage power to the specific door motor relay.
If your main computer begins failing, other electronic anomalies will usually appear alongside the window issue. You might notice erratic door locks, flickering interior lights, or radio glitches. These centralized computers manage dozens of separate cabin functions simultaneously.
Table: Component Failure Symptoms and Indicators
Failure Point | Primary Symptom | Secondary Indicators to Watch For |
|---|---|---|
Door Jamb Wiring | Total loss of electrical function | Window works only when door is halfway open. |
Central Computer Hub | Intermittent or delayed operation | Locks, interior lights, or radio act erratically. |
Physical Button | Directional failure (only down) | Button feels noticeably loose, sticky, or crunchy. |
Replacing a central computer hub requires professional reprogramming at a certified shop. Never attempt to swap this sensitive computer module without proper diagnostic software. Dealerships must flash the new unit to match your specific vehicle identification number.
You need trustworthy evidence before ordering new components. Guessing wastes your hard-earned money and delays the repair process. We empower you to verify the exact electrical fault safely at home. You can confidently isolate the problem using basic diagnostic procedures.
Tools Required for Testing:
A standard digital multimeter.
A set of plastic interior trim removal tools.
A small flathead screwdriver.
Safety glasses and work gloves.
The Continuity Test Process
Remove the unit from the panel: Carefully pry the bezel away from the door panel. Emphasize extreme care here. Automotive plastic clips grow brittle over time, especially in hot climates. Use plastic pry tools to prevent deep scratches on your cosmetic interior trim. Never force a stuck panel.
Probe the electrical terminals: Disconnect the main wiring harness connector. Set your digital multimeter to the ohms or continuity setting. Place your multimeter probes on the main electrical terminals. You must press the toggle up and down while holding the probes steady. You might need a vehicle wiring diagram to identify the correct pins.
Read the multimeter results: Watch the multimeter screen closely. A healthy unit will show a clear change in electrical resistance when pressed. You will typically see the screen drop to near zero ohms. A total lack of resistance change indicates a completely dead unit. The internal metal contacts have likely burned away.
Decision Milestone
This testing procedure serves as your ultimate diagnostic checkpoint. If the component tests perfectly fine, the fault hides within your wiring harness or door connector. If the component fails the multimeter test, you can proceed to component replacement confidently. Do not skip this verification step. It prevents the frustrating experience of installing a brand-new part only to discover the window remains stuck.
You must evaluate your repair options based on time, budget, and personal skill level. Help yourself make the final purchasing decision by weighing these practical criteria carefully. Both paths offer distinct advantages depending on your specific situation.
The DIY Repair Approach
Taking on this task yourself offers significant financial benefits. You will experience high cost savings because professional labor often exceeds three times the part cost. You can easily source OEM and aftermarket replacements online today. Replacing these components is generally a beginner-friendly DIY project. Most installations take less than thirty minutes.
However, the DIY route carries some specific risks. You risk damaging cosmetic door trims if you rush the process. You also require basic hand tools and a safe, well-lit workspace. You must ensure you purchase the correct part matching your exact trim level.
The Professional Shop Option
Taking your vehicle to a professional shop provides immense peace of mind. Experienced technicians guarantee high diagnostic accuracy. They excel at tracing complex short circuits deep within the chassis. Furthermore, legitimate repair shops offer solid warranties on their labor and installed parts.
The main drawback involves higher upfront expenses. Diagnostic fees can easily exceed $100 before the technician even orders the replacement part. Shop scheduling might also leave you without a vehicle for several days.
Common Mistakes When Buying Parts:
Ordering parts for a different model year.
Ignoring the auto-down feature compatibility.
Buying the cheapest aftermarket option available.
The Bottom Line
Popping out a plastic bezel and swapping a localized button is a simple weekend task. You can complete this repair in your driveway. Conversely, tracing a wiring short or handling a central computer failure requires advanced diagnostic software. Choose the path matching your verified electrical fault and personal comfort level.
A car window functioning normally from one seat but remaining dead at another offers a clear diagnostic path. This specific symptom confidently proves the heavy lifting components are in excellent working order. Your troubleshooting strictly involves the communication network between the interior door panels.
Action-Oriented Next Steps:
Test the child safety lockout feature thoroughly before buying anything.
Perform a multimeter continuity test to physically confirm a dead unit.
Order a direct-fit replacement part matching your specific vehicle trim level.
Use plastic non-marring tools to prevent interior dashboard damage during installation.
Following these steps guarantees an accurate, cost-effective repair. You can restore fresh air to your cabin without overspending on unnecessary automotive parts.
A: Yes. If the switch fails in the "closed" position, it continuously sends electrical power to the window motor. The motor will draw high amperage even when the glass is fully raised. This constant electrical draw will quickly deplete your car battery while the vehicle is parked.
A: Usually, no. Many modern vehicles allow you to pry up just the small plastic switch bezel from the armrest. You can easily disconnect the wiring harness from above. However, some older models require full interior panel removal. Always refer to your specific vehicle service manual before prying.
A: Switch contacts burn out directionally. The "up" contact often fails first. Lifting the heavy glass against gravity requires significantly more amperage than letting it roll down. This higher electrical load creates small internal sparks. Over time, these sparks burn away the metal contact pad for the upward direction.