Views: 0 Author: Site Editor Publish Time: 2026-08-04 Origin: Site
Power mirrors failing to adjust creates an immediate safety hazard. You lose crucial rearward visibility while navigating heavy traffic or tight parking lots. It also triggers a frustrating diagnostic loop for many vehicle owners. Blindly replacing the entire mirror assembly wastes valuable time and money when the real issue sits further up the electrical chain. Why throw parts at a problem when a simple test provides the correct answer?
Our purpose here is straightforward. We want to provide you with a verifiable diagnostic framework. You will learn exactly how to isolate electrical faults in your vehicle doors. We will show you how to distinguish between a faulty control interface, a dead internal motor, and underlying wiring issues. By the end of this guide, you will know how to make confident, accurate repair decisions without second-guessing your automotive electrical system.
If neither the driver nor passenger side mirror moves, the fault typically lies with the mirror switch, the fuse, or the wiring harness, not the motors.
A functional switch that produces a clicking or humming sound at the mirror indicates a stripped or failing mirror motor.
Shared electrical grounds mean a failing power window switch or door wiring harness can sometimes mimic a mirror switch failure.
Modern memory-seat mirrors rely on the body control module; systemic electrical glitches require OBD2 diagnostics before parts replacement.
Establishing the functional differences between localized mechanical failure and upstream control failure saves hours of troubleshooting. Every diagnostic process begins by interpreting the symptoms accurately. You must observe how the system behaves before tearing off any door panels. We can categorize these failures into two distinct buckets: switch problems and motor problems.
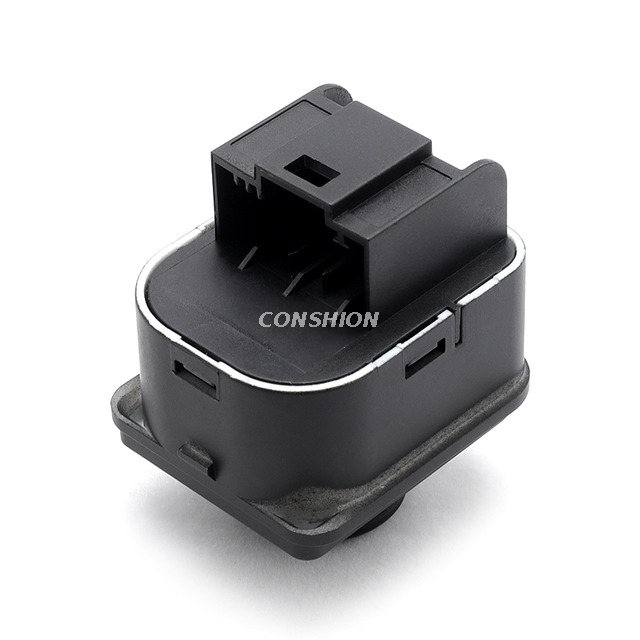
The control interface experiences constant physical interaction. Drivers press these buttons daily. Over time, moisture, dirt, and heavy-handed inputs degrade the internal contacts. Carbon buildup creates excessive electrical resistance. When this happens, voltage never reaches the door harness. You should suspect the switch under these specific conditions:
Symmetrical Failure: Both driver and passenger mirrors are completely unresponsive. It is statistically highly improbable for both left and right motors to fail at the exact same moment. If neither side responds, the interface is likely dead.
Directional Dead Zones: The mirror moves up and down but not left or right. This behavior strongly indicates failing internal switch contacts. The copper contact pads wear out unevenly based on your most frequent adjustment directions.
Physical Degradation: The toggle feels physically loose or sticky. It fails to click definitively into the left or right position. Spilled beverages often cause this sticky operation, ruining the internal circuit board.
The actuators inside the housing face harsh environmental conditions. They endure freezing rain, intense summer heat, and automatic car washes. The tiny plastic gears inside these housings become brittle over time. When you suspect a mechanical failure at the housing itself, look for these signs:
Asymmetrical Failure: Only one mirror fails to move while the other operates perfectly normally. This isolates the problem away from the main power feed.
Audible Cues: Pressing the controls results in a whirring, grinding, or clicking noise inside the housing. However, you see no physical movement. This proves power is reaching the destination, but the internal plastic gears are stripped.
Intermittent Sticking: The glass moves slowly or requires physical assistance from your hand to complete its arc. Weak or dying magnetic coils inside the actuator cause this sluggish behavior.
Best Practice: Always test the mirrors while the vehicle engine is running. A weak car battery can sometimes cause slow motor operation. Testing with a running alternator provides full voltage to the circuit.
Guessing leads to unnecessary expenses. We need to objectively prove which component has failed. You can accomplish this using standard multimeter testing. This diagnostic framework walks you through the electrical chain step by step. Grab your digital multimeter and set it to measure direct current (DC) voltage.
First, we must verify that power actually reaches the door trim. Carefully pry up the plastic bezel surrounding the controls. Unplug the main harness connector.
Turn your vehicle ignition to the "ON" position (engine off).
Set your multimeter to DC Volts.
Connect the black probe to a clean, unpainted metal chassis ground.
Probe the main power feed wire in the harness connector using the red lead. You should see approximately 12 volts.
Next, switch the multimeter to measure resistance (Ohms). Probe the ground wire terminal. It should read close to zero ohms to the chassis.
Watch out for shared ground faults. These circuits often share grounding locations with the adjacent power window switch panel. If both your windows and mirrors fail simultaneously, you likely have a severed ground wire in the door jamb boot. The constant opening and closing of the door eventually fractures old copper wiring.
If you have solid power and ground at the harness, the next step isolates the controls. Disconnect the assembly completely from the vehicle. Move it to a clean workbench.
Set your multimeter to the continuity setting (the one that beeps).
Consult your vehicle wiring diagram to identify the specific input and output pins.
Place your probes across the pins corresponding to the "Up" command.
Physically press the directional pad upward.
Listen for the beep. The meter should beep or show near-zero resistance.
A lack of continuity confirms a dead electrical unit. The internal copper contacts are fried or heavily oxidized. In this case, replacing the controls will solve your problem immediately.
If the controls pass the continuity test, we must evaluate the actuator itself. This step bypasses all vehicle wiring.
Remove the interior door card to access the actuator harness connector.
Identify the two primary wires controlling the vertical or horizontal axis.
Apply direct 12V power and ground from a fused jumper wire connected to a 12V battery.
Observe the glass. It should move swiftly in one direction.
Reverse the polarity of your jumper wires. The glass should move in the opposite direction.
If the glass moves flawlessly under direct jumper power but fails when using the door panel, your problem lies in the wiring harness bridging the door to the chassis. If it groans, clicks, or ignores direct power, the actuator is officially dead.
Older vehicles utilize simple, direct-wire circuits. Power flows from the battery, through the toggle, directly to the actuator. Modern vehicles are much more complicated. They utilize networked modules to manage interior features. Distinguishing between direct-wire systems and module-controlled systems dictates your diagnostic path.
If your car features memory seating, reverse-tilt functions, or key-fob-linked profiles, your mirrors operate on a network. Modern vehicles route control inputs directly through the body control module. The controls do not send high-current power directly to the doors. Instead, they send a low-voltage data request to the module. The module then processes this request and commands the actuators to move.
When the central computer fails, symptoms rarely remain isolated to a single component. You must look for broader systemic electrical glitches. Watch out for these warning signs:
The mirror failure coincides with erratic cabin behavior.
Interior dome lights flicker or stay on indefinitely.
Power door locks actuate randomly or ignore remote key fob commands.
The radio display resets or drains the battery overnight.
The memory seat presets forget their saved positions.
You might find yourself in a frustrating scenario. You run your multimeter tests. The buttons show perfect continuity. The actuators jump perfectly when supplied with direct 12V power. Yet, when fully assembled, nothing works. In this situation, the commands are being ignored by the network. A professional scan tool becomes mandatory. You need a bi-directional scanner to read specific B-codes (Body codes) from the network. Never replace a computer module blindly without reading the communication codes first.
Once you identify the failed component, you face a new set of challenges. Evaluating the financial and labor implications of replacing each part helps you plan your weekend repair. Some tasks require only a flathead screwdriver. Others require specialized trim removal tools and immense patience.
Common Mistake: Never pry interior plastic panels during freezing weather. Cold temperatures make plastic retaining clips incredibly brittle. They will shatter instantly. Always perform interior trim work in a heated garage or during warm summer days.
The cost expectation here remains generally low to moderate. Automotive manufacturers produce these components in massive quantities. Sourcing a replacement mirror switch is usually quick and painless.
The labor reality varies by manufacturer. On many vehicles, you only need to pry up a small decorative bezel on the door armrest. You disconnect the wiring harness, pop out the old unit, and snap the new one into place. The entire job takes less than ten minutes. However, on certain European models, manufacturers secure the bezel from the underside. This requires removing the entire interior door panel just to access two hidden screws.
The cost expectation here shifts to moderate or high. Dealerships rarely sell the internal actuator motor separately. They usually mandate purchasing the entire exterior housing assembly. If your vehicle features heated glass, integrated turn signals, or blind-spot monitoring sensors, the replacement cost climbs significantly.
The labor reality is also much more intensive. You must remove the interior door card completely. You will peel back vapor barriers and unbolt three main retaining nuts holding the heavy exterior housing to the door frame. Occasionally, you must carefully pop off fragile glass panes to access hidden internal torx screws. The risk of collateral damage runs high for novice DIYers. Dropping the glass means buying another expensive part.
Repair Difficulty and Risk Comparison
Component | Average DIY Time | Tool Requirement | Collateral Risk Level |
|---|---|---|---|
Control Interface | 10 - 30 Minutes | Plastic trim pry tools, basic screwdriver | Low (Minor plastic clip breakage) |
Internal Actuator | 1 - 2 Hours | Socket set, torx bits, masking tape | High (Shattering mirror glass pane) |
Complete Housing | 1 - 1.5 Hours | Deep socket set, trim tools | Moderate (Scratching exterior door paint) |
Network Module | Varies by location | Bi-directional OBD2 Scan Tool | High (Requires dealer software programming) |
We need an actionable framework for the final purchase decision. You have run your tests, evaluated the risks, and understand the systems involved. Follow this shortlisting logic to finalize your repair strategy.
You should immediately order a replacement interface if both exterior sides are completely dead. You should also proceed if your multimeter continuity tests fail miserably on the workbench. Furthermore, if the directional contacts are demonstrably worn out, loose, or sticky to the touch, you have found your culprit. Always look for OEM-spec replacements. Cheaper aftermarket options often suffer from poor LED backlighting matching and sloppy tactile feedback. OEM components ensure precise plug-and-play fitment.
You should source a new exterior actuator or complete housing if only one side is dead. If you hear the actuator groaning under load when you press the buttons, the internal gears are stripped. Most importantly, if you performed the direct 12V jump test and yielded absolutely no movement, the actuator is permanently seized. Tape around the door frame before unbolting the housing to protect your paint.
Stop buying parts if your vehicle features memory mirrors and your multimeter tests pass perfectly. If the buttons have continuity and the actuators jump with direct power, you face a network communication error. Consult an automotive technician equipped with proper diagnostic software. They will read the data stream and determine if a control module requires a software flash or complete physical replacement.
Successfully diagnosing automotive electrical issues requires patience and a logical workflow. You must avoid the temptation to guess based on visual symptoms alone. Always follow the fundamental diagnostic chain: check the fuse first, verify the controls, inspect the wiring harness, and finally test the destination actuator. This methodical approach guarantees accurate results.
We encourage you to secure a reliable digital multimeter before attempting any repairs. Confirm your symptoms objectively. Verify your power and ground circuits. Test for continuity across the interface pins. By validating each link in the chain, you eliminate wasted spending on unnecessary parts. Take control of your diagnostic process today, and restore full functionality to your vehicle safely and efficiently.
A: Rarely. Both driver and passenger exterior housings typically share a single dedicated fuse in the cabin fuse box. A single-side failure usually points directly to a dead actuator motor or burnt side-selector contacts inside the main door controls.
A: Not directly through module logic, but they often share a primary wiring harness and a major ground point inside the driver's door panel. Severe moisture corrosion or a broken ground wire in this shared area can cause both systems to fail simultaneously.
A: They usually last the entire lifespan of the vehicle. However, they are highly subject to premature failure from moisture intrusion. Leaving your windows rolled down during a rainstorm or exposing them to heavy mechanical wear will drastically shorten their operational life.